
Introduction
Workflow Signature is very useful and easy to track the data according to our requirement. The combination of workflow (which triggers an E-Mail) and Signature (which is for Authorization) using with the Workflow rule.
The Workflow rules are used to define the execution of a number of actions when specific events occur within the Sage X3.
The actions can as follow:
- Sending of messages by the e-mail system
- Display of notifications in planning workbenches
- Updating of data via the execution of actions, either directly when the event occurs or later when the recipient(s) of the notification will have performed an action (visa or signature action in the planning workbench)
- Data coming from the triggering context may be used in the messages, notifications and actions.
There are very different events which can trigger a Workflow rule:
- Action of the user in object management mode (creation, modification, triggering of an action)
- Execution of a batch task, an import, a report
- Signature action on a prior notification (in that case, it is possible to have complex nested signature circuits)
- Batch process running through a group of tables in the database
Now, let’s take an example of Sales Order Object, with a Workflow Signature whenever a user creates or modified the Sales Order, then immediately workflow signature should be implemented. Further, this entire flow will be explained in detailed.
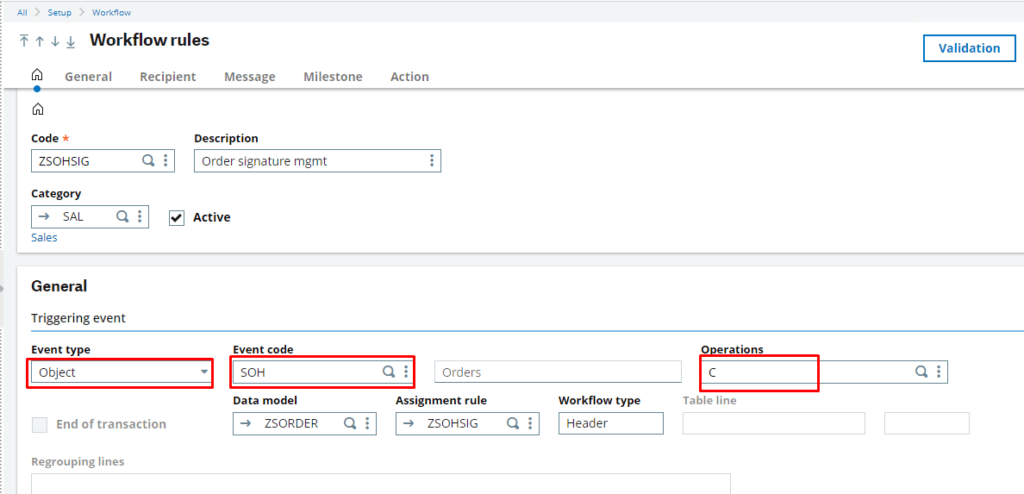
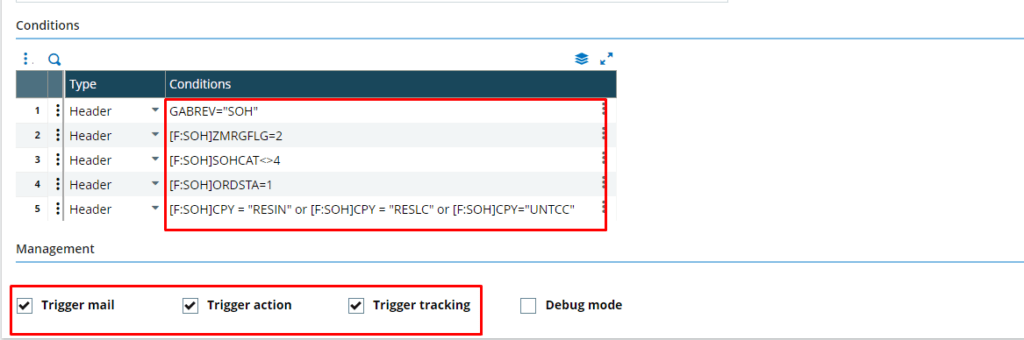
In order to implement the workflow signature, create the workflow rule with Even Type is an Object and Event code SOH (Sales Order Object), Operation: C, M [Create & Modifies]. Under condition tab you can specify the condition accordingly.
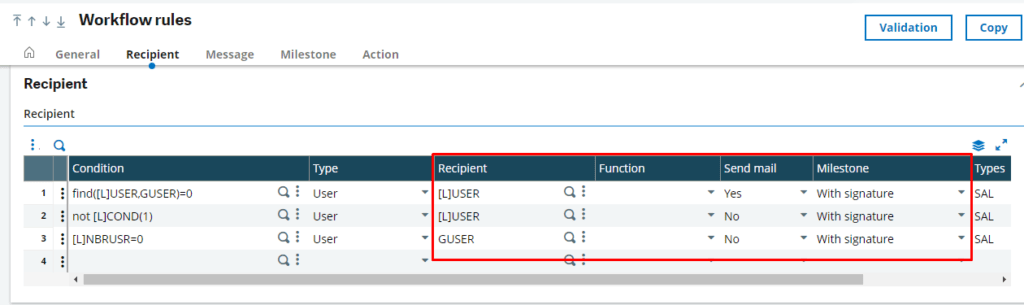
Now, Under Recipients tab assign the E-mail Id and select “Yes” for Send mail and select with “Signature” for Milestone as below screen shot:
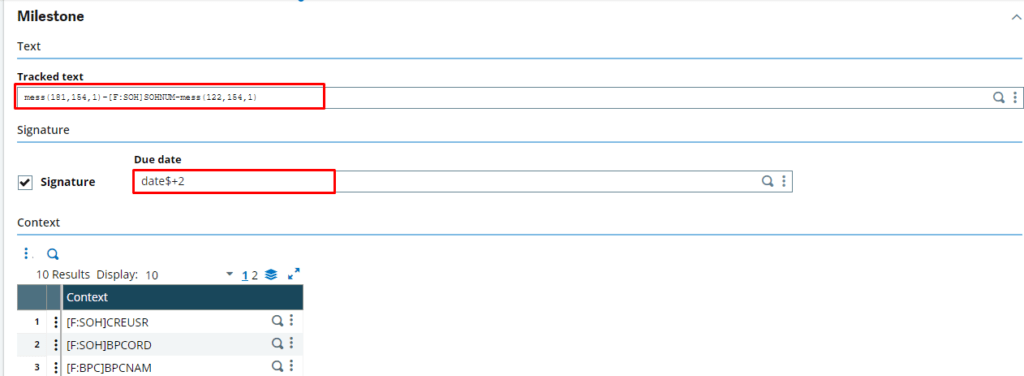
Under Milestone tab, check the Signature and assign the parameters as below screen shot:
Tracked text: This message will be displayed in the workflow monitor
Check the “Signature” check-box.
Specify the “Due date”, which will be displayed in the Workflow monitor under “To be Read” tab in LT Column.
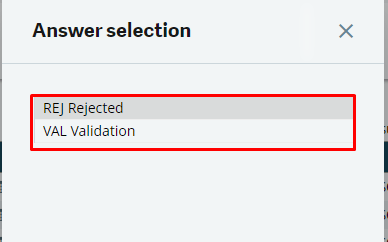
Under Answer tab, specify the VAL (Validation) and REJ (Rejection) as shown in the below screen shot.
Note: Under Reason specified the value of 56 (miscellaneous table) for REJ which is “Reserved for Workflow”

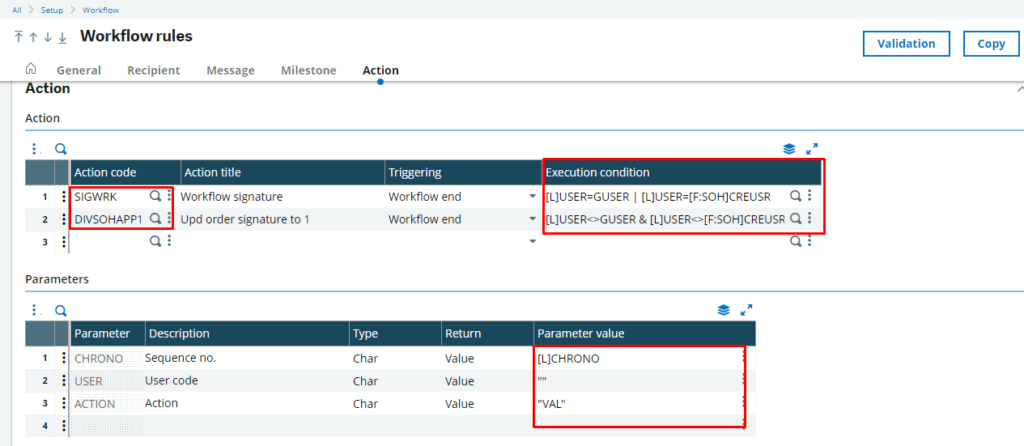
Under Action tab, assign the “SIGWRK” for action code and specify the Execution condition as [L]USER=GUSER|[L]USER = [F:SOH]CREUSR as shown in the below screen shot:
Under the Parameters tab, assign the parameter values as mention in the above screen and then click on “Save” button.
Note: Check the Active check-box in the header tab.
Now, create a new record then the workflow will trigger as per the conditions assigned in workflow rules.
Once, click on Create button workflow will trigger & after this the recipient will get an E-mail along with attachment document which contains the information of creation or modification of a particular record.
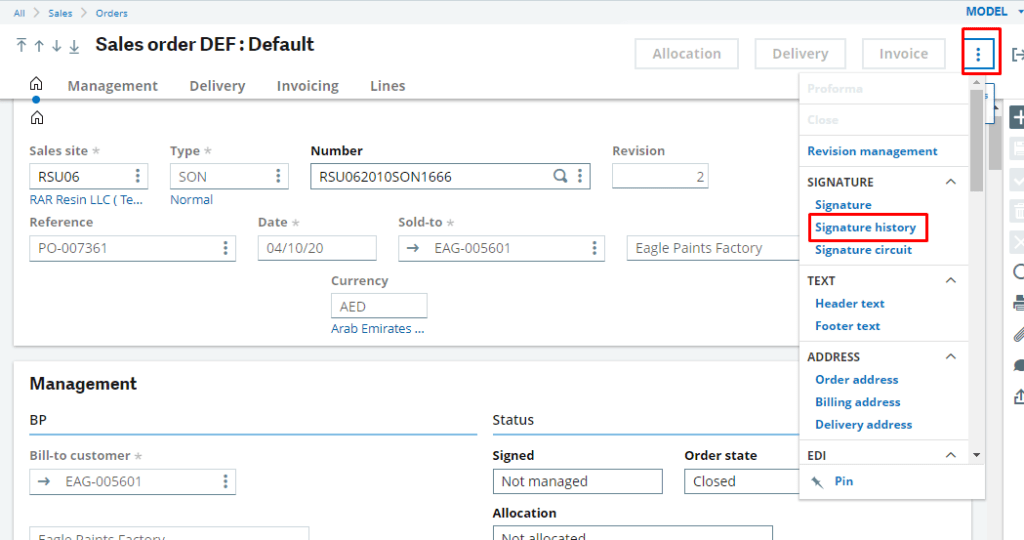
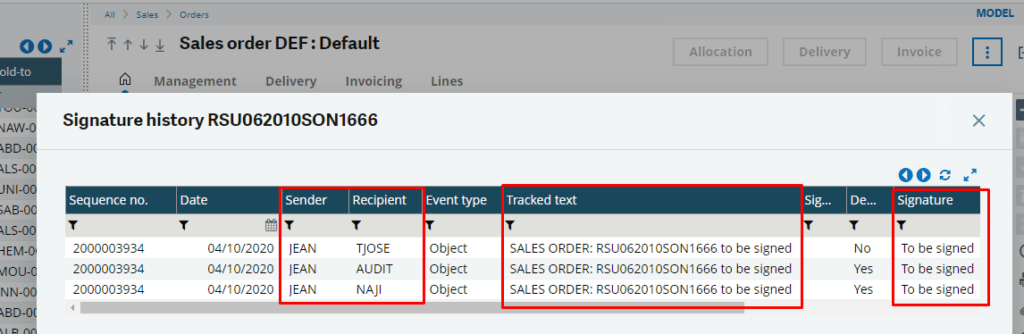
You can see the history of approval, by clicking on “Signature request history”
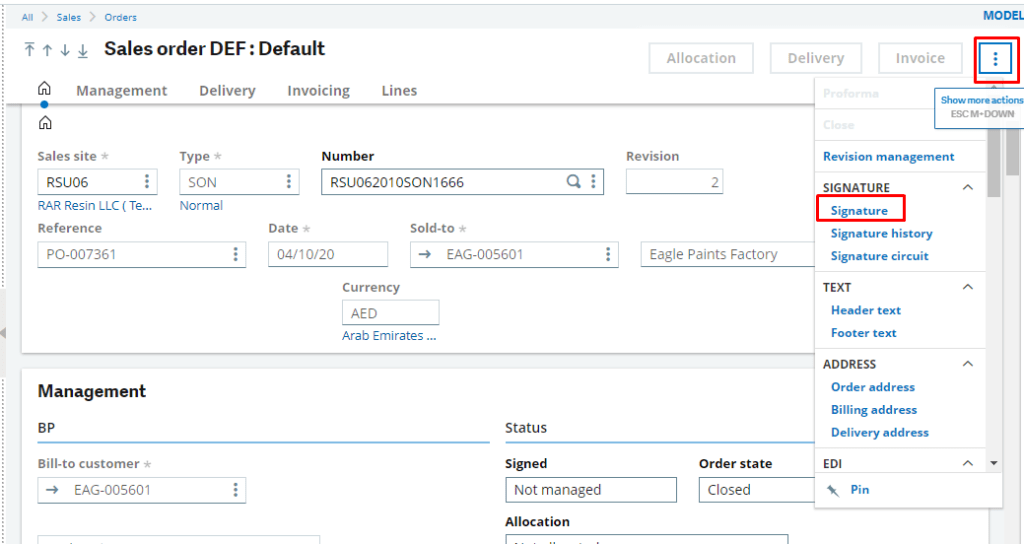
To sign/validate the SO, login with authorized user then go to SO screen & Click on “Signature” from the right panel.
Now, Click on “Validation” and click on “Ok” Button.
Note: If you have selected the REJ, then you need to specify the reason for Rejection which will be selecting from the Miscellaneous Table 56 as mention while creating the workflow rule.
Let us help you to get the maximum out of Sage X3 / Sage 300, for more information or even for a free training on Sage X3 / Sage 300, please reach us on info@rfrgroup-me.com or www.rfrgroup-me.com and We will be more than happy to help you!